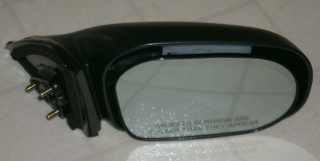
1 - Toyota Tercel Left outside mirror (part description: "Front Door, 4
Door, Outside Mirrors, Mirror Assy, W/O Remote(L)")
PN 87940-16780 ($53
in 2002)
1- Toyota Tercel Right outside mirror (part description: "Front
Door, 4 Door, Outside Mirrors, Mirror Assy, W/O Remote(R)")
PN 87910-16780 ($36
in 2002)
One piece of 16-18 gage sheet steel, 10"x10"
8 - 8-32 by 1/4" long button head stainless steel screws (source from
McMaster Carr, etc.)
8 - 8-32 Panel or "PEM" nuts
4 - 8-32 screws, any head design, 3/8" long
4 - 8-32 nuts and lock washers
6 - 6Mx20mm coarse thread (1mm pitch) stainless steel button head screws
Blue loc-tite
Paint (optional)
Tools:
1 - correct drill bit for drilling holes for PEM nuts (varies - check with
PEM nut supplier) This may be a numbered drill bit.
1 - drill bit for through-holes for 8-32 screws.
1 - drill motor
1 - hack saw (band saw would be nice)
1 - 3/32" allen wrench (for bracket to door frame button head screws)
1 - 4mm allen wrench (for mirror to bracket button head screws)
1 - open end wrench for 8-32 nuts (most likely 3/8")
1 - deburring tool
1 - 8mmx1mm pitch tap
1- metal file, medium fine cross cut
1 - #2 Phillips screwdriver
1 - miniature C clamp (2")
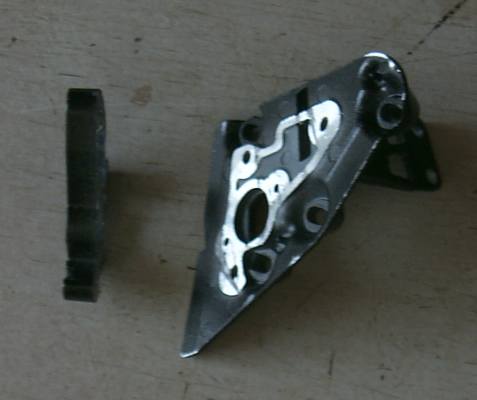
Modify the Mirrors:
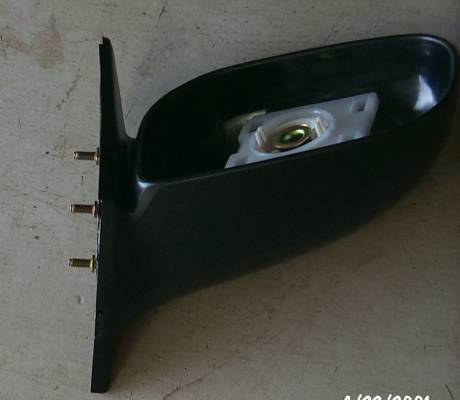
You have to remove the protrusion from the casting on the mirror as shown.
Use a hacksaw or band saw (it's aluminum and cuts
quickly). First, remove the mirror from the housing by pulling
on the outside edge of the mirror. It will come flying off with a
bang, but not break. Then unscrew all the phillips head screws that
hold the casting into the plastic housing. Make note of the short
screw to replace it in the correct hole upon reassembly.
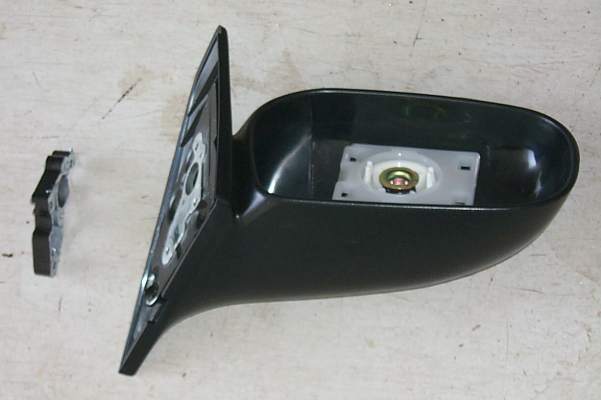
Now, drill the blind holes for mounting the mirror that the 3 studs
normally hold the mirror onto the Tercel with. Be careful not to
ruin the existing threads. Use the correct tap drill for a 6mmx1mm
pitch tap. Thread the extended hole with the 6mmx1mm tap. Alternately,
you could drill the existing threads out and use a larger bolt after threading
the hole.
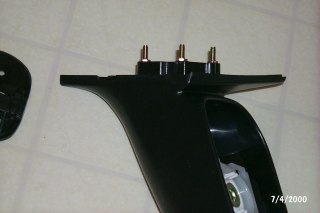
In the last photo, the OE studs are screwed back into the mirror.
The surface of the casting is now flush with the plastic mirror housing.
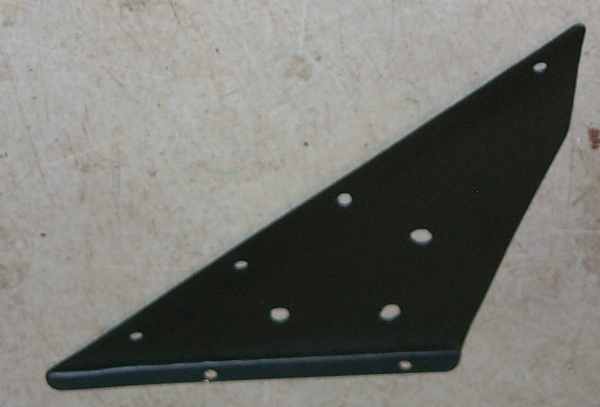
Fabricate the Mounting bracket:
I made the flat plate type bracket extend up to the window frame, somewhat
following the line of the back edge of the mirror housing where it meets
the door. This probably helps to keep the mirror from flopping around.
Place the housing against the door window frame and outer window door top
weatherstrip and make a cardboard teamplate to mock the bracket.
I put a 90 degree bend in the bottom of the bracket so it would rest on
the weatherstrip frame. Note that a slight bend along the window
frame area of the bracket will keep the bottom of the bracket from moving
toward the window. This is impossible to see in the photo.
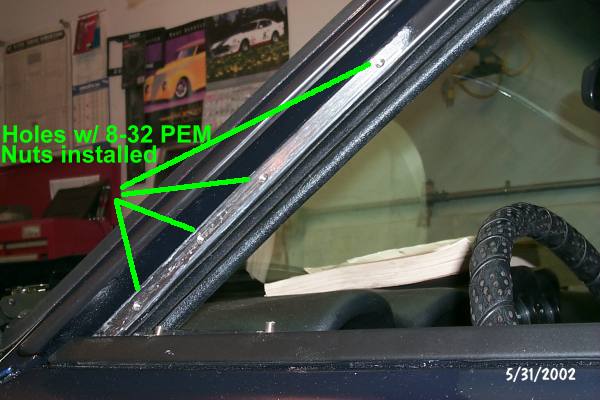
Preparing the Window Frame and Weatherstrip:
Once the bracket is cut and bent, hold it against the door window frame/weatherstrip
and mark on the inside where the door window frame stops on the bracket.
Taking account of the lip in the window frame, the diameter of the PEM
nuts, etc, decide where the 4 holes in the bracket along the slanted edge
should be. After drilling these holes to pass 8-32 screws,
use the bracket as a drill match template on the window frame to mark where
to drill the holes for the PEM nuts. Drill the correct size holes
for the PEM nuts (mine needed a numbered drill with 0.213" diameter).
I used a putty knife between the window frame and the window channel fuzzy
to protect the window channel fuzzy. Also, be sure to de-burr the
hole on both sides. A de-burring tool with the correct attachment
makes this easy. Move the fuzzy away from the channel, place the PEM nut
in the hole, and use a miniature C clamp to press the knurled portion of
the PEM nut into the hole.
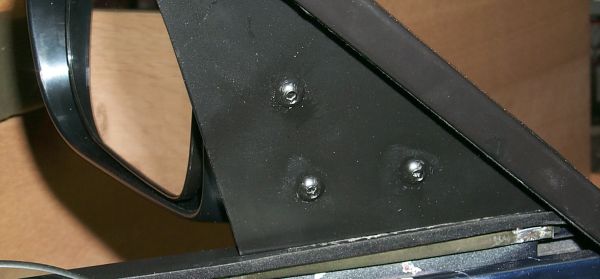
(Click on image for larger view)
Note the "studs" protruding from the stainless part of the door top
window squeegy. I used 10-24 hardware here, but 8-32 will work fine.
You need to cut down the head of the screw to get it into the bottom of
the SS part of the squeegy. Drill holes to push them through.
If you cut two sides off the screw head, you get a "t-bolt" looking part,
that won't spin in the SS part. Of course plan the placement of the
holes ahead of time, as there are clips, window roller, etc. in the way
underneath.
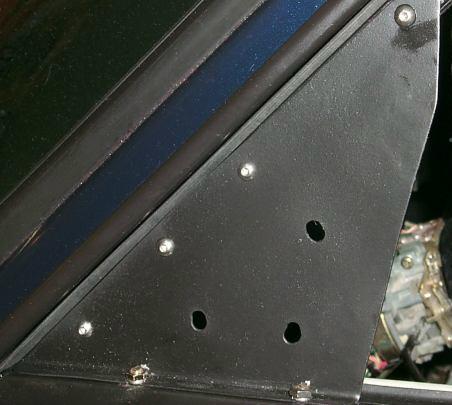
Install the Bracket and Mirror:
Once all the holes are drilled, the PEM nuts are inserted, the screws protrude
from below the window squeegy fuzzy SS part, and the window squeegy part
is in place on the door, the bracket can be attached to the door.
Use blue loc-tite to keep the bracket secure.
Using the OE studs in the mounting holes in the mirror, mark where the
three holes should be drilled in the backet. Drill the holes to clear
a 6mm bolt. Mount with the 6mm buttonhead screws.
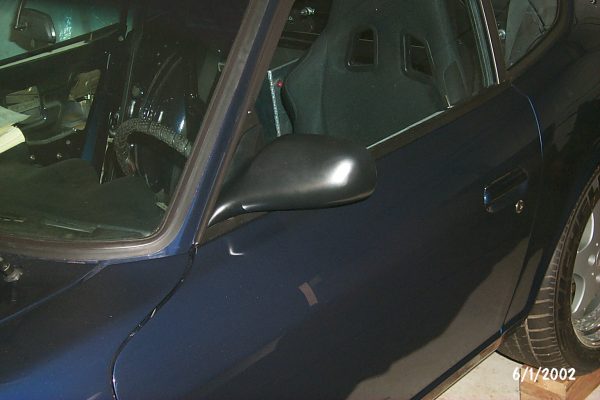
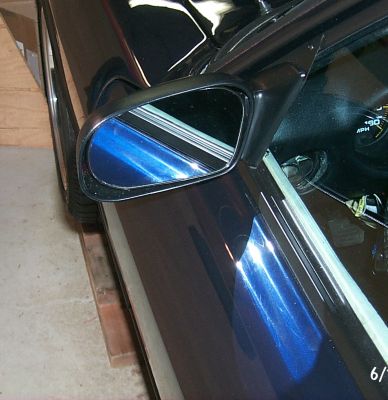
And here are the results. I painted my bracket and screws (once
installed) with SEM trim paint, along with my new door top window squeegy.