 |
 |
|
|
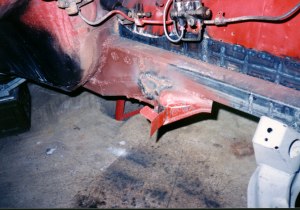
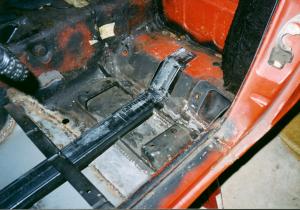
This is how the V8 conversion started many years ago (1992). I had engine compartment frame rails that were rusting from the inside out (this is a Maryland car that I drove all year round in college). So the plan was to cut those out and replace them, and to add frame rails from the firewall to the "subframe" that's behind the seats, under the floor.
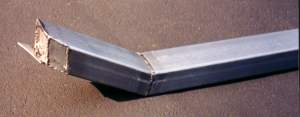
I made replacement engine frame rails out of 2.5"x2.5", .093" wall square steel tubing. I put a pocket in the sides for the crossmember attachment, narrowed them at the front, and put a sturdy mount for the swaybar.
These are considerably stiffer than stock. Plus I got the chance to rustproof them on the inside. Additionally, I had to replace the bottom corner of the radiator support where the rails end. Much tedious fabrication and welding. All critical dimensions were measured in all 3 dimensions, so that the car would be back to being as square and symmetrical as possible.
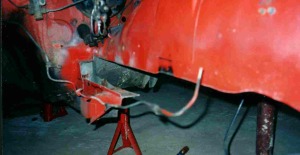
Well, after hacking the original rails off the front
as shown at the top of the page, I saw that there was considerable rust
at the firewall, inside of the frame. So out came the firewall in
this area, and the T/C rod bracket, after measurements were made in 3 dimensions.
  |
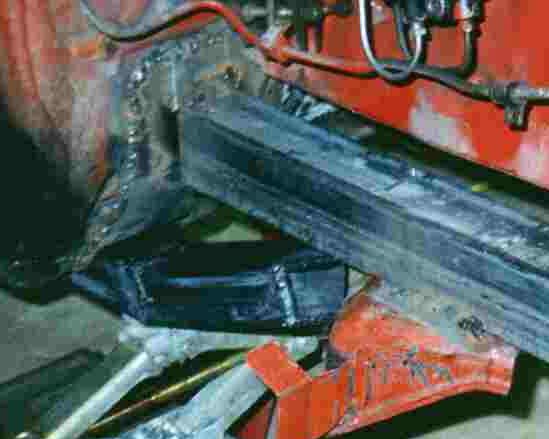 |
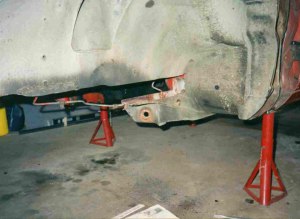
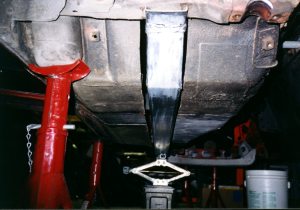
As you can see, I tied the new floor frame rail (2"x3" .085" wall steel tubing), the engine frame rail, the firewall reinforcement, and the T/C bracket together. This ought to be quite a bit stiffer and stronger than the stock Z, and a great improvement over the rusty stuff that was there.
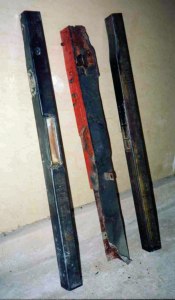
As for the floor frame rails, below are decent pics
of the one made for the passenger (right) floor.
 |
 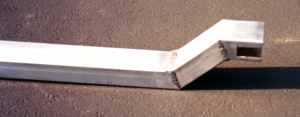 |
Here is a drawing of the left floor frame rail. I don't have one dimension covered at the rear end, so that will have to be an exercise for the user ;). Also, please double check these dimensions, as I copied the dimensions off of a 5 year old after-the-fact template.
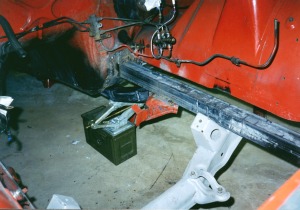
The drivers side floor was cut out to accept the rail, and strips of material added to either side of the rail to tie it together. On the passenger side, I did a much nicer job, replacing the entire floor, and having one large piece of steel floor on either side of the rail. Below is a picture of the drivers side. Ugly, but functional.

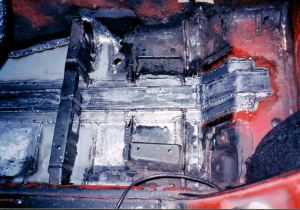
As I said, the second side (right) turned out much prettier, but they are both stiff and strong.
(Since these pictures were taken, I've had a 6 point modified S&W roll bar added. This consisted of the 8 pt kit's roll bar, inboard frame supports, and bars that tie top of roll bar to the top of the strut towers. I left out the side (door) bars. I had the installer section the roll bar so that it would fit between the inner wheel wells on the raise portion of the floor just behind the seat mounts. This was so that a Corbeau A4 seat could be mounted back far enough for me to stretch my legs comfortably.)
Well, after this work was done, along with the floor and firewall section replacements (at the inner fender where the battery sat as well), I started in on replacing the rocker panels and rear quarters. At this point I learned the horrible truth - the rust was EVERYWHERE:
Bottom of right "toolbox",
Front and rear of inner rocker boxes,
Back edge of roof,
Around the rear floor where the fuel fill hose goes through,
as well as the usual places at the bottom of the hatch opening, front
fenders, lower front of doors, etc.
And so started the total disassembly of the car, the building of the rotisserie, and the expense of tons of time and money...